In the last weeks, I've been exploring my options for hosting a Ruby on Rails application. An important step was Windows Azure. I registered for a 90-day trial to give it a try. One of the great services Microsoft has offered was the Ubuntu virtual machine ( :D ). So this tutorial can be useful even with a normal Ubuntu machine (except the Endpoints part) since I'm treating it like an Ubuntu machine regardless of the Azure service it is hosted on.
In this tutorial, I will create a new Ubuntu 12.04 LTS virtual machine, install Ruby ( 1.9.3 ) and Rails ( 3.2.9), install Passenger gem, install Apache server and connect it to Rails application. And finally, some important notes about getting your project up and running.
Create an Ubuntu 12.04 LTS VM:
- In you portal, from the bottom right corner click: New -> Compute -> Virtual Machine -> From Gallery.
- Scroll the list to Ubuntu Server 12.04 LTS and click it.
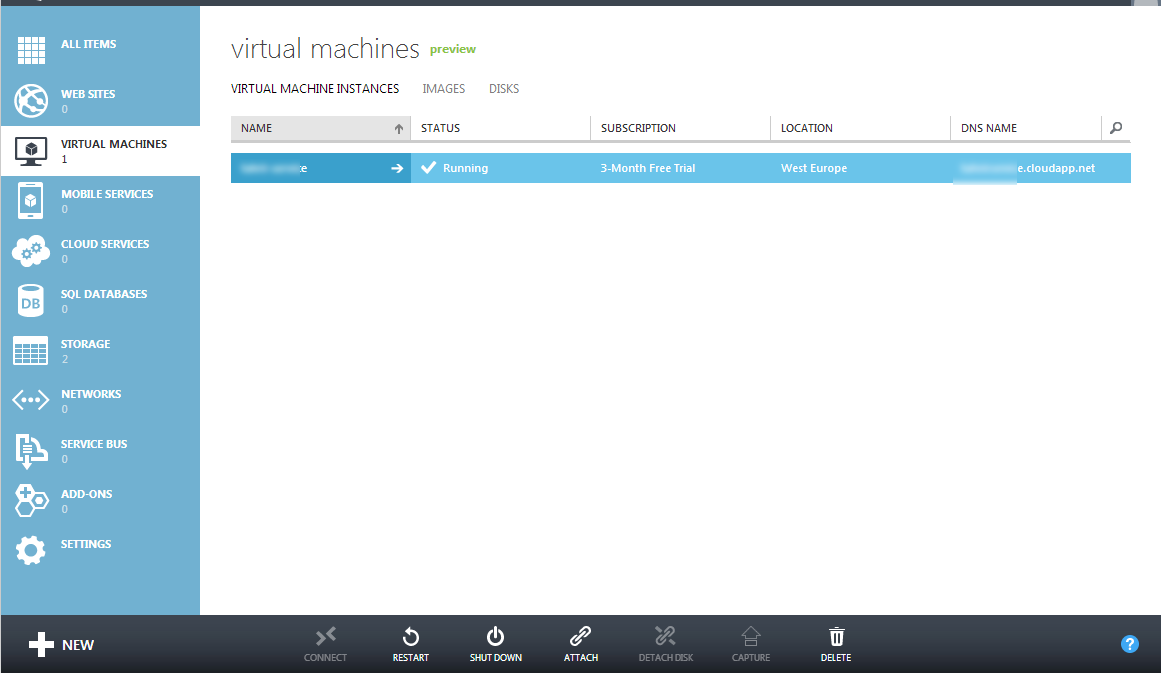
- Fill the required data about the VM name, the username to create in that machine and password (you will need them A LOT), and number of cores running this machine (I'm on trial version, so 1 is enough to try it).
- Choose the appropriate DNS name (your service URL) and the suitable place for the service.
- You are done with the VM creation.


Create Endpoints for SSH, FTP, Apache:
- The endpoint is the way of communication between the VM and the outer world. Each endpoint takes a public port (the one you call) and a private port (the one the VM listens to).
- Click on the created VM, select the ENDPOINTS tab. You will find that the SSH endpoint is already created on port 22.
- Now create two other ports for FTP (port 21) and Apache service (default port, port 80). Names of the endpoints do not matter, but you'd better give them meaningful names.
- Do not forget to start the VM before the next step.

Access the Ubuntu Server Through SSH:
- All you interaction with the server will be though SSH via port 22. Although you can then install a GUI package and remote access the server, I choose not to do this because of the extra space and CPU cycles it takes, and common, this is Linux, you only need a terminal to have fun!
- Since I'm using windows, I use a nice SSH client: PuTTY. Just download, run, enter your server's name and click 'open', enter usrename/password in the terminal that shows up.
- Now you are on board, let's install Ruby and Rails.
Note: You can copy and paste inside PuTTY terminal as follows: highlight the terminal text with the mouse to copy it, and right click on the terminal to paste.
Install Ruby and Rails:
- Some people prefer to install Ruby using 'rbenv' or 'rvm', but I prefer simplicity. I'll just install Ruby directly.
- If you cannot 'sudo apt-get install ruby -v 1.9.3' directly, you may follow these steps:
Then install Rails
Install Passenger and Apache:
- The passenger gem is the connection between Apache server and your rails app. We need to install Passenger, Apache, and the Passenger's Apache module.
(edit: I've been facing some issues with v3 when restarting the server, so I added --pre to install the yet-not-released v4. In case you have v4 by the time you read this, just proceed with the command as it is.)
- The previous line will open an installation wizard to guide you though the installation of the module. It is supposed to ask you for extra packages to install. In my case, these were the packages:
- After installing the missing packages, run the module installation one more time.
- Now the module will install and ask you to add some paths to the apache config file which is supposed to be in 'etc/apache2/apache2.conf'.
- It will also give you an example of how to add a virtual host to get your rails app running through Apache.
- To open the file from terminal, use:
- Here is what I had to add to my config file:
In this tutorial, I will create a new Ubuntu 12.04 LTS virtual machine, install Ruby ( 1.9.3 ) and Rails ( 3.2.9), install Passenger gem, install Apache server and connect it to Rails application. And finally, some important notes about getting your project up and running.
Create an Ubuntu 12.04 LTS VM:
- In you portal, from the bottom right corner click: New -> Compute -> Virtual Machine -> From Gallery.
- Scroll the list to Ubuntu Server 12.04 LTS and click it.
- Fill the required data about the VM name, the username to create in that machine and password (you will need them A LOT), and number of cores running this machine (I'm on trial version, so 1 is enough to try it).
- Choose the appropriate DNS name (your service URL) and the suitable place for the service.
- You are done with the VM creation.


Create Endpoints for SSH, FTP, Apache:
- The endpoint is the way of communication between the VM and the outer world. Each endpoint takes a public port (the one you call) and a private port (the one the VM listens to).
- Click on the created VM, select the ENDPOINTS tab. You will find that the SSH endpoint is already created on port 22.
- Now create two other ports for FTP (port 21) and Apache service (default port, port 80). Names of the endpoints do not matter, but you'd better give them meaningful names.
- Do not forget to start the VM before the next step.

Access the Ubuntu Server Through SSH:
- All you interaction with the server will be though SSH via port 22. Although you can then install a GUI package and remote access the server, I choose not to do this because of the extra space and CPU cycles it takes, and common, this is Linux, you only need a terminal to have fun!
- Since I'm using windows, I use a nice SSH client: PuTTY. Just download, run, enter your server's name and click 'open', enter usrename/password in the terminal that shows up.
- Now you are on board, let's install Ruby and Rails.
Note: You can copy and paste inside PuTTY terminal as follows: highlight the terminal text with the mouse to copy it, and right click on the terminal to paste.
Install Ruby and Rails:
- Some people prefer to install Ruby using 'rbenv' or 'rvm', but I prefer simplicity. I'll just install Ruby directly.
- If you cannot 'sudo apt-get install ruby -v 1.9.3' directly, you may follow these steps:
sudo apt-get update

sudo apt-get install ruby1.9.1 ruby1.9.1-dev \
  rubygems1.9.1 irb1.9.1 ri1.9.1 rdoc1.9.1 \
  build-essential libopenssl-ruby1.9.1 libssl-dev zlib1g-dev

sudo update-alternatives --install /usr/bin/ruby ruby /usr/bin/ruby1.9.1 400 \
         --slave   /usr/share/man/man1/ruby.1.gz ruby.1.gz \
                        /usr/share/man/man1/ruby1.9.1.1.gz \
        --slave   /usr/bin/ri ri /usr/bin/ri1.9.1 \
        --slave   /usr/bin/irb irb /usr/bin/irb1.9.1 \
        --slave   /usr/bin/rdoc rdoc /usr/bin/rdoc1.9.1

# choose your interpreter
# changes symlinks for /usr/bin/ruby , /usr/bin/gem
# /usr/bin/irb, /usr/bin/ri and man (1) ruby
sudo update-alternatives --config ruby
sudo update-alternatives --config gem

# now try
ruby --version
Then install Rails
sudo gem install rails --no-rdoc --no-ri
Install Passenger and Apache:
- The passenger gem is the connection between Apache server and your rails app. We need to install Passenger, Apache, and the Passenger's Apache module.
(edit: I've been facing some issues with v3 when restarting the server, so I added --pre to install the yet-not-released v4. In case you have v4 by the time you read this, just proceed with the command as it is.)
sudo gem install passenger --no-rdoc --no-ri
sudo passenger-install-apache2-module
- The previous line will open an installation wizard to guide you though the installation of the module. It is supposed to ask you for extra packages to install. In my case, these were the packages:
sudo apt-get install libcurl4-openssl-dev apache2-mpm-prefork apache2-prefork-dev libapr1-dev libaprutil1-dev
- After installing the missing packages, run the module installation one more time.
sudo passenger-install-apache2-module
- Now the module will install and ask you to add some paths to the apache config file which is supposed to be in 'etc/apache2/apache2.conf'.
- It will also give you an example of how to add a virtual host to get your rails app running through Apache.
- To open the file from terminal, use:
sudo nano etc/apache2/apache2.conf
- Here is what I had to add to my config file:
LoadModule passenger_module /var/lib/gems/1.9.1/gems/passenger-3.0.18/ext/apache2/mod_passenger.so
PassengerRoot /var/lib/gems/1.9.1/gems/passenger-3.0.18
PassengerRuby /usr/bin/ruby1.9.1

<VirtualHost *:80>
  ServerName adly-test.cloudapp.net
  # !!! Be sure to point DocumentRoot to 'public'!
  DocumentRoot /home/adly/apps/testrails/public

  <Directory /home/adly/apps/testrails/public>
     # This relaxes Apache security settings.
     AllowOverride all
     # MultiViews must be turned off.
     Options -MultiViews
  </Directory>
</VirtualHost>
Upload Your Project Using FTP:
- Some tutorials go for using Github and some packaging tools, but I do not like that. I want to upload my files myself. So I'm using "vsftpd" for the Ubuntu Server side, and FileZilla on the my Windows side.
(You can use Git without the need to Capistrano or Unicorn gems, remember it is just a Linux machine. Git is better for continuous development.) (you can also use WinSCP client for SFTP protocol and forget about FTP client and end point)
- Install vsftpd
sudo apt-get install vsftpd
- Edit the config file:
sudo nano /etc/vsftpd.conf
- Modify the following lines:
#local_enable=YESto
local_enable=YES
#write_enable=YESto
write_enable=YES
anonymous_enable=YESto
anonymous_enable=NO
- Restart the FTP server
sudo service vsftpd restart
- Now we are done with the server side. On the client side, install FileZilla and open it.
- From "Edit" -> "Settings", make sure the settings are as follows:


- From the main screen, enter your service URL, username, password, and port 21 and click "Quick Connect".
- Now you will have the server folders on the right, and your local files on the left. Move and modify however you want.

Fine tuning to get things working right (do not trust HelloWorld tutorials):
If you create a dummy project using 'rails new testrails', it will probably work fine. But those tutorials do not give the complete case of a real application, so here are some extra steps to do to avoid errors or unknown behavior.
Rails and Apache log file:
- It happens that the Rails app will write to the Apache log file, so it is better to locate a custom path to that log file instead of the default path. I prefer logging errors in a log file in the same directory of Rails log folder. So I add the following line to the VirtualHost configuration in the apache config file. I also prefer declaring the Rails working environment explicitly to avoid any human/machine errors in the future.
ErrorLog /home/adly/apps/testrails/log/error.log
RailsEnv production
so it is now like
LoadModule passenger_module /var/lib/gems/1.9.1/gems/passenger-3.0.18/ext/apache2/mod_passenger.so
PassengerRoot /var/lib/gems/1.9.1/gems/passenger-3.0.18
PassengerRuby /usr/bin/ruby1.9.1

<VirtualHost *:80>
  ServerName adly-test.cloudapp.net
  # !!! Be sure to point DocumentRoot to 'public'!
  DocumentRoot /home/adly/apps/testrails/public
  ErrorLog /home/adly/apps/testrails/log/error.log
  RailsEnv production

  <Directory /home/adly/apps/testrails/public>
     # This relaxes Apache security settings.
     AllowOverride all
     # MultiViews must be turned off.
     Options -MultiViews
  </Directory>
</VirtualHost>
Assets Compilation:
- You have to set this line to true
config.assets.compile = truein {app_root}/config/environments/production.rb
and do not forget to compile the assets whenever changed:
rake assets:precompile[check the "ExecJS Error, and libv8 / therubyracer version errors" section at the bottom if you have an error]
DB migration:
- If you have a database in your project, the declaration of "production" environment in the apache config file is not enough, you have to declare it explicitly when migrating:
rake db:migrate RAILS_ENV="production"
FILES PERMISSIONS:
- This is a very important step, since some files are still owned by you with zero permissions to other users.
- The quick and not-so-liberal permission is 755 for all the application folder
sudo chmod -R 755 /path/to/your/app/
- (just in case you face problems later, make this step) Double check that you give rwx privileges to the DB, assets, log and tmp folders for the user running this app whenever you add new files. For example:
sudo chmod -R 755 /path/to/your/app/app/assets
sudo chmod -R 755 /path/to/your/app/db
sudo chmod -R 755 /path/to/your/app/tmp
sudo chmod -R 755 /path/to/your/app/log
- Note: Do not forget to check the permissions of any new file you upload.
ExecJS Error, and libv8 / therubyracer version errors:
- Now this is something very common with a lot of workarounds. It is on Rails 3 because of some compatibility issues. You should get an error like "Could not find a JavaScript runtime. See https://github.com/sstephenson/execjs for a list of available runtimes.".
- To solve this problem, open your Gemfile, and add the following lines under the "group :assets do" section:
gem 'therubyracer', '0.11.0beta8', :platforms => :ruby
gem 'libv8', '~> 3.11.8.3', :platform => :ruby
then do not forget to "bundle install". No need for 'sudo', let the gems be installed locally.
[update: libv8 compilation may take several minutes if there is no matching binary for your OS version and specified version number. On another server I had to change the version to '3.11.8.3' to save time and CPU usage. Click here for more: Installing with native extensions stall ]
One final note: Do not forget to restart Apache server for the changes to take effects.
sudo service apache2 restart
Excellent tutorial thanks. However, when I go on to my Azure site I'm getting the message:
ReplyDelete'Forbidden: You don't have permission to access / on this server.'
The error.log is outputting:
'AH01630: client denied by server configuration: /home/workspace/cloudappazure/public/favicon.ico'
Have you any idea what I'm doing wrong? You're specific in the config file saying '# !!! Be sure to point DocumentRoot to 'public'! . Is this correct if I don't have an index.html file there (my root is in views/home)?
Thanks again for the tutorial. I've tried to deploy to Azure by following 2 other tutorials over the last 4 days and have failed with both. I'm banging my head off the wall at this stage
Even if you do not put your index file in the public folder. Rails serves all requests from public folder then goes for routes. So once you delete the index.html from public folder, it will serve from /home/show.
DeleteJust set the DocumentRoot to the public path of your project and it should work.
Ok thanks. My DocumentRoot is set to the public folder but Apache is giving me the error noted. It was late last night when I was working on it but I'll try again after work today. I wonder if I added 'Require all granted' would it help.
ReplyDeleteI added 'Require all granted' under 'AllowOverride all' and restarted the apache server. Everything worked. Thanks again for the tutorial.
ReplyDelete